How to Write a Check

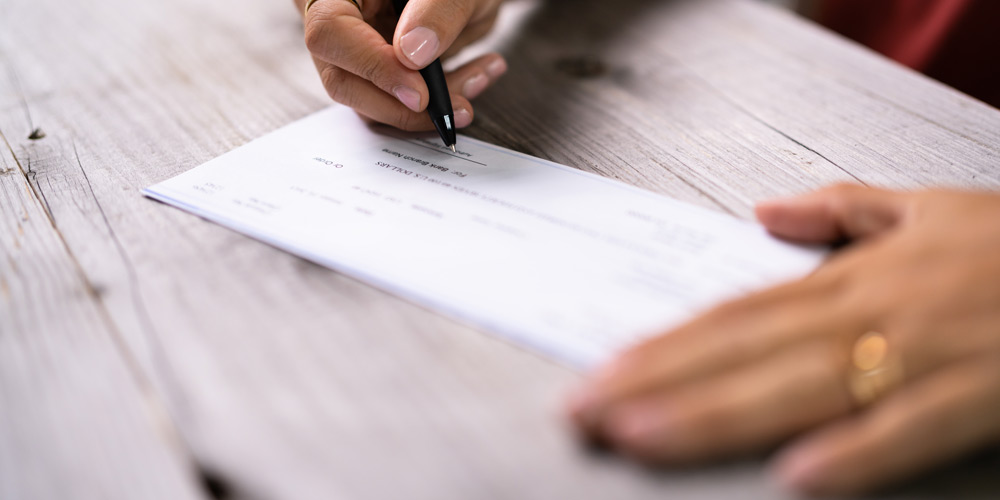
It’s true, people still use checks.
It might not seem like it, but even in today’s digital age, checks are a valid form of payment for just about everything: groceries, rent, utility bills, haircuts, you name it.
While many people and businesses prefer credit cards or online payments, there are times when a check is specifically requested or required. In these cases, it’s important to know how to write a check correctly to avoid a potentially costly mistake.
Here is a step-by-step guide on how to write a check.
How to write a check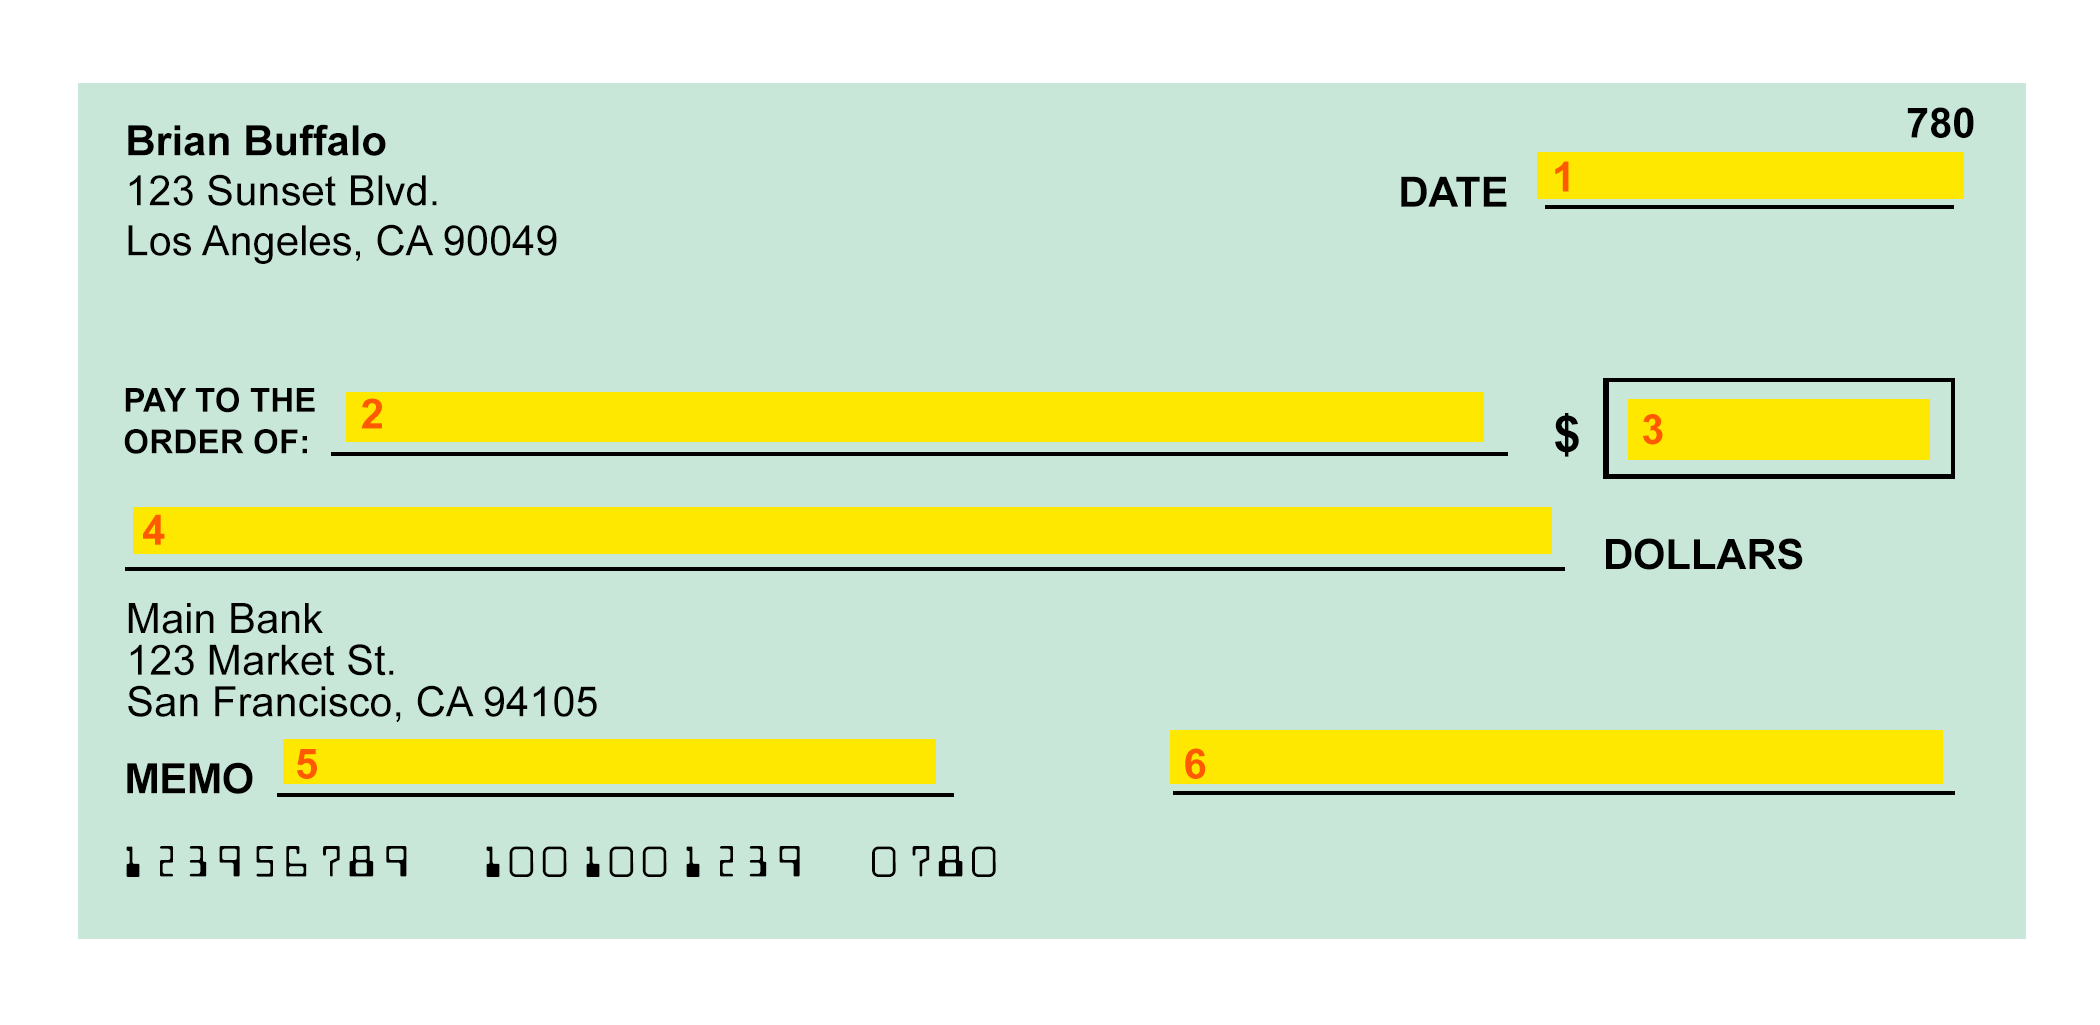
Step 1: Fill out the date on the check.
Most often you will use the date that you’re writing the check. However, if you don’t want the check to be cashed until later (maybe when you have sufficient funds in your account), you can use a future date instead. Checks can only be cashed on or after the date written on the check. If you are going to use a later date, make sure it is acceptable for the recipient of the check, whether it’s a landlord or a friend, before doing so.
Step 2: Write down the intended recipient of the payment.
Be sure to use the full legal name of the person or company so they will be able to cash it.
Steps 3 & 4: Write down the amount you’re paying in two places.
One will be in the box, where you’ll provide a numerical figure. The second will be on the line below it, where you’ll spell out the amount using words instead of numerals.
Step 5: Next, fill out the “memo” or “for” line with the purpose of the check.
This step is optional, and is mostly for your own records, as the bank will include this note in your records when the check is processed. Providing a memo may also be helpful for, or requested by, the person or business you are paying.
Step 6: Sign your full name on the signature line.
Without your signature, the bank will not be able to process the check.
Parts of a check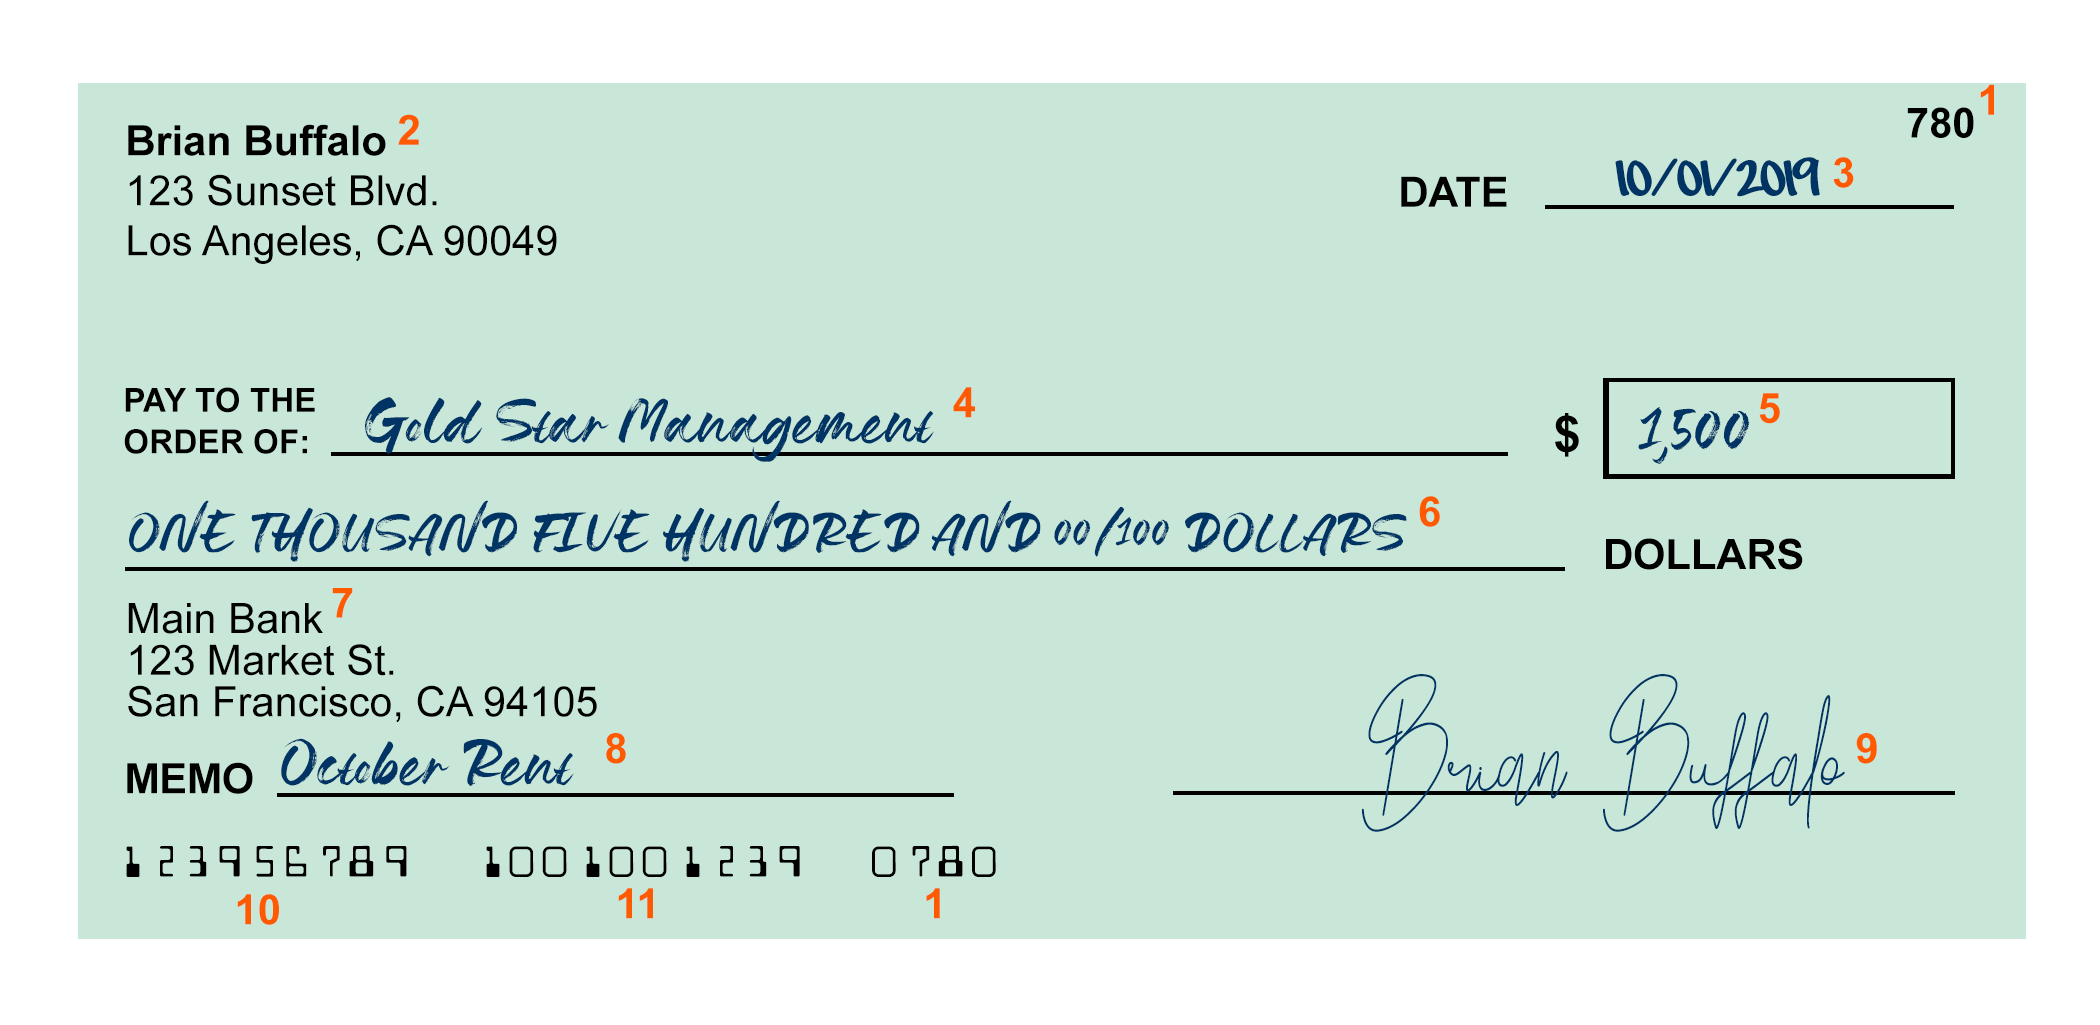
1. Check number
Every check has a unique check number. It’s located on the upper right corner of the check, as well as on the bottom near the routing and account number.
2. Name and address
Checks issued by a bank will typically include the printed name and address of the account holder on the upper left-hand side.
3. Date
The date should be written on a blank line located near the top of the check. Include month, day, and year.
4. Pay to the order of
A blank line denoting “pay to the order of” is where the full legal name of a company or individual should be written.
5. Numeric amount
The dollar amount of the check is written in the empty box. Don’t forget commas and decimals where appropriate.
6. Written amount
The amount of the check is written out fully on the blank line near the numeric amount. The dollar amount should be spelled out, but the cents figure can be written in numerals as a fraction out of 100.
7. Bank name and address
Banks often include the name and address of their business on checks. It’s located right below the written dollar amount.
8. Memo
Checks contain a memo line, which is used to describe the purpose of the check. Write a brief description here, such as “electric bill,” or just leave it blank.
9. Signature
The signature line is located next to the “for” line and should be signed with the check holder’s full legal name. It’s important to sign each check, because it gives the bank authorization to release money to the recipient.
10. Routing number
A routing number is a nine-digit code on a check that is based on the location where a bank account was first opened. This is printed on each check on the bottom left-hand side.
11. Account number
An account number is usually a 10- to 12-digit number that is tied to a personal bank account. It’s located right next to the bank routing number on a check.
Practice writing a check
Ready to give it a shot? Here are two worksheets to test your knowledge.
Instructions: Use the check below and in the attached worksheet to answer the following questions.

1. What is the name and address of the person who wrote the check?
____________________________________________________________________________
2. What is the name of the person or company to whom the check was written?
____________________________________________________________________________
3. What is the amount of the check?
____________________________________________________________________________
4. What is the check for?
____________________________________________________________________________
5. What is the routing number?
____________________________________________________________________________
Practice writing a check worksheet
Instructions: Lauren needs to pay her monthly electric bill. She owes the New York electric company, ConEd, $53.20 for the month of June. She sits down to write the check. It’s July 6, 2023. What should she write on the check? Download the attached worksheet and help Lauren write her check using the blank check image below.